
Creating Records in the Data Catch-all Repository
This guide explains how to sign in to the Data Catch-all Repository, create a record, upload files, provide metadata, configure access, and submit the record for publication.
Before You Start
To create and manage records, you must have the appropriate repository permissions and be signed in using your institutional identity.
For information about registration, see Getting Access to the Data Catch-all Repository
Signing in to the Repository
Browse to the Data Catch-all Repository and sign in using your institutional identity.
Public records can be searched and viewed without signing in. After signing in, you can also access your dashboard, create records, manage drafts, and perform actions permitted by your role.
Creating a New Record
To create a record:
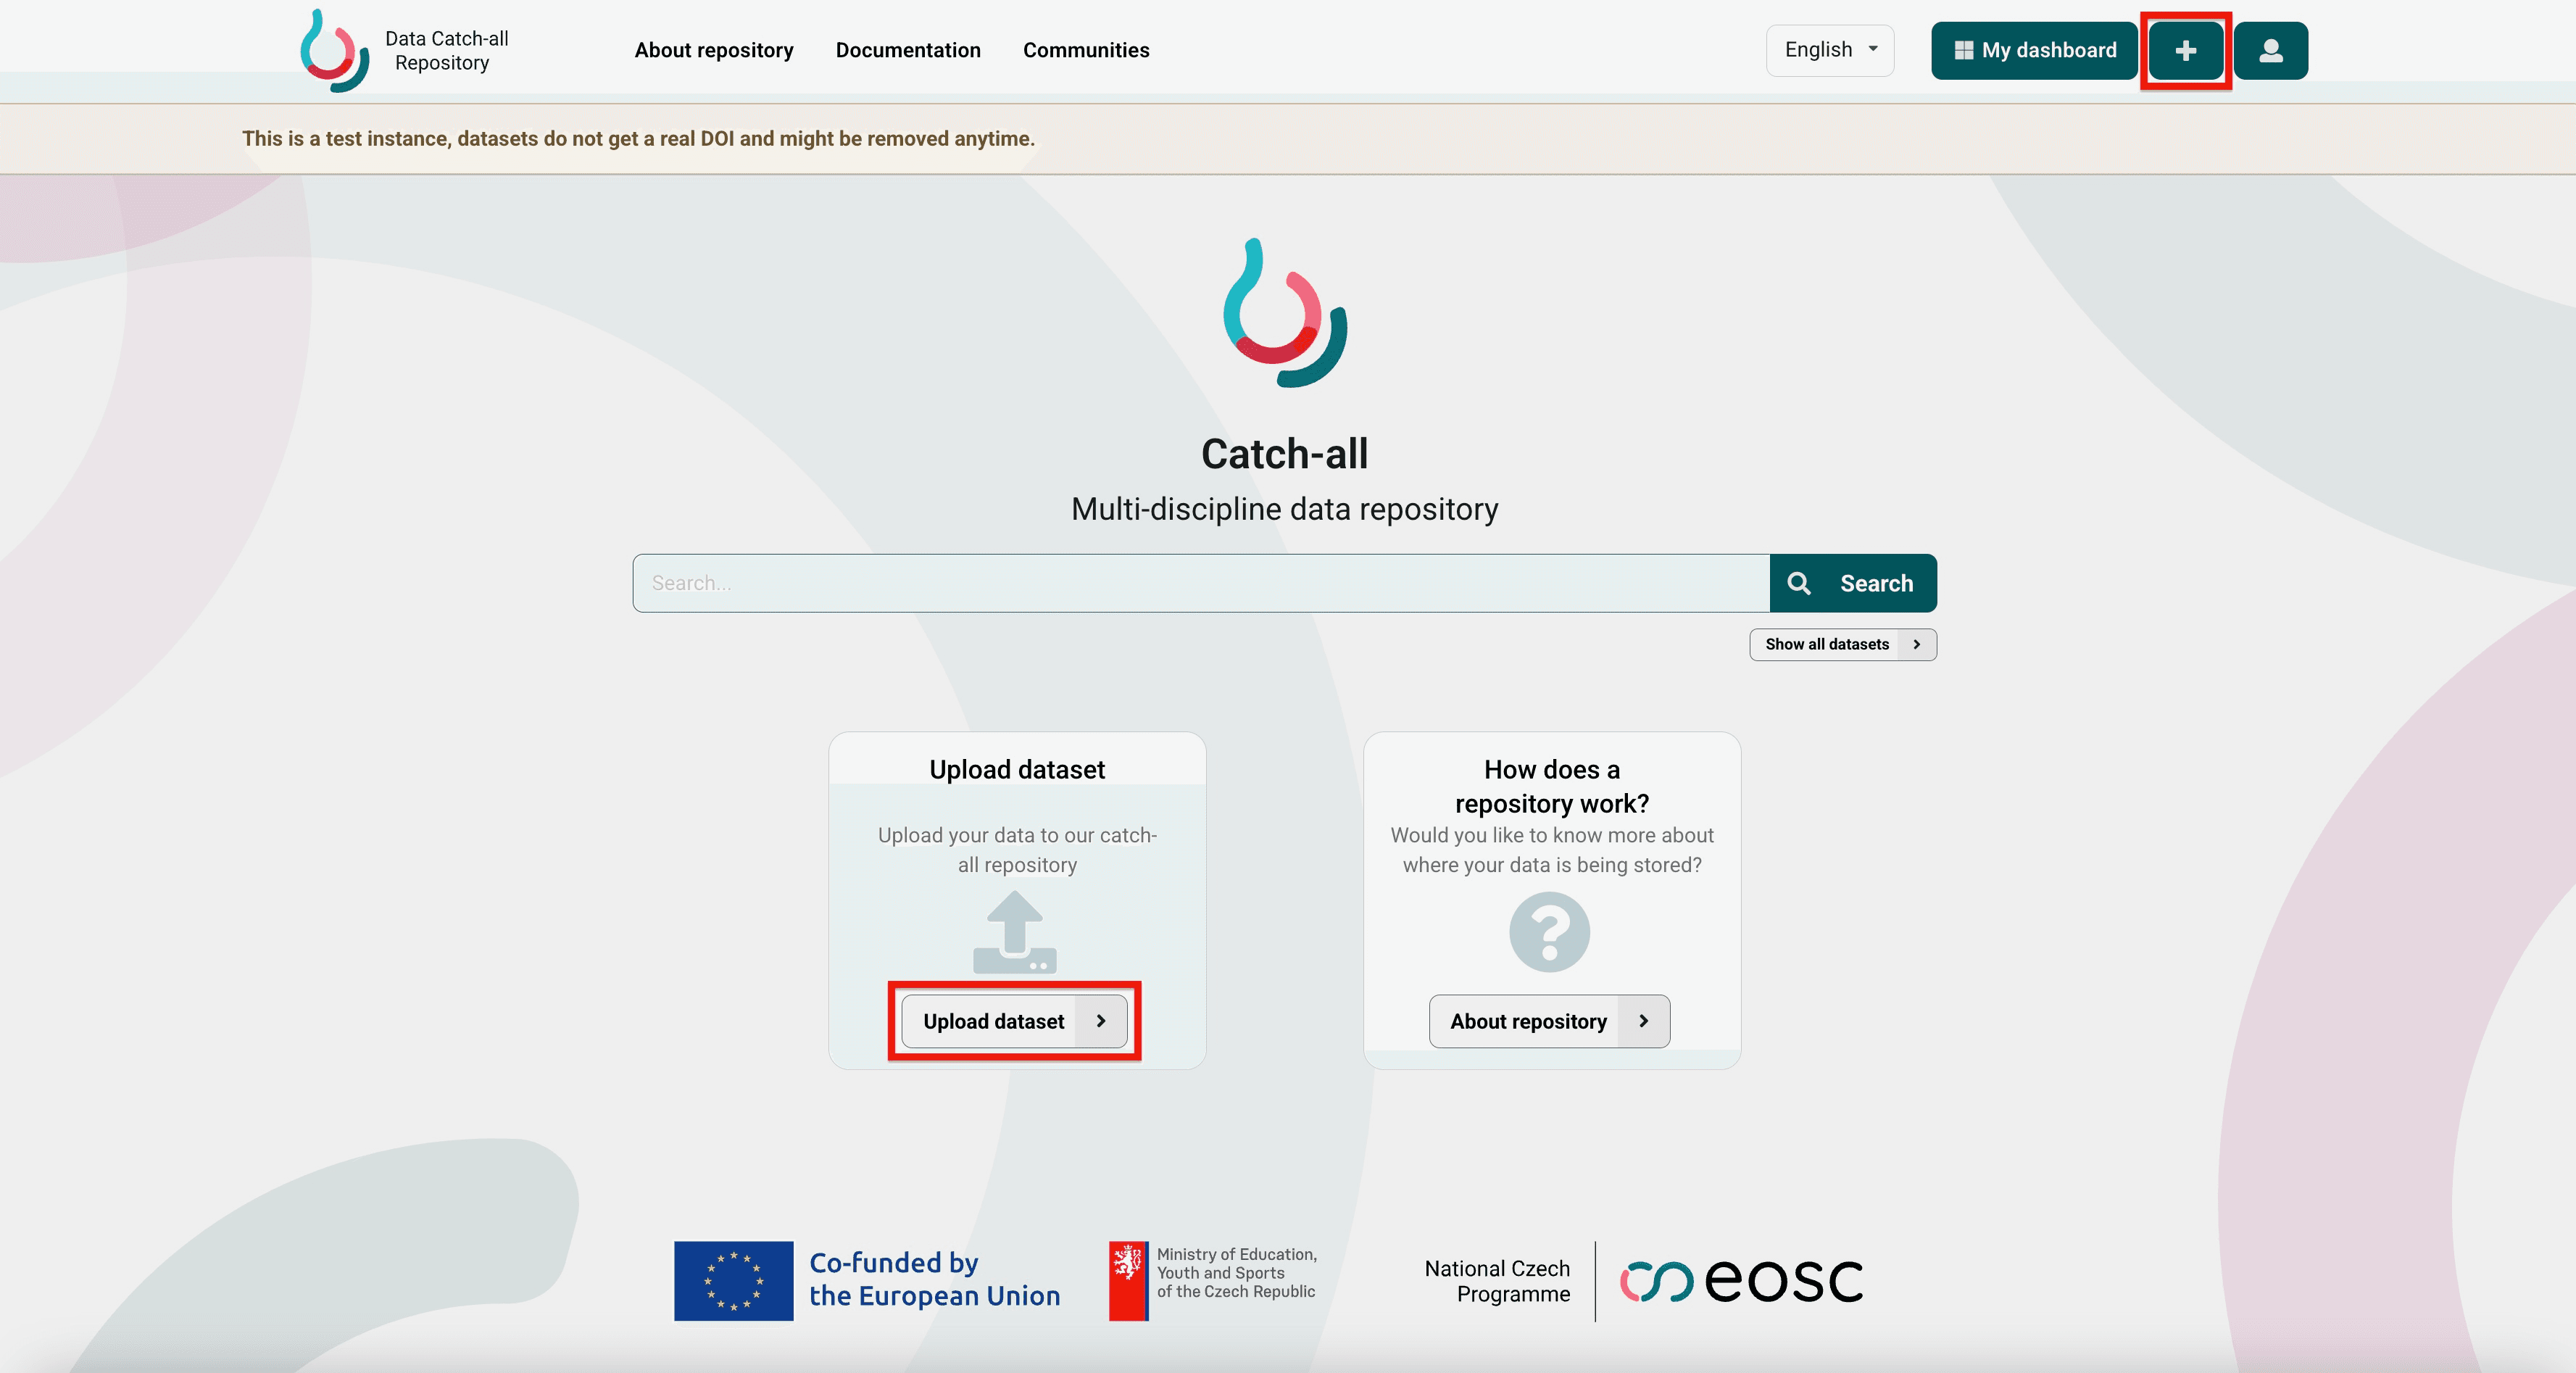
- Select the + button in the top navigation.
- Select New record.
- Complete the sections of the record form.
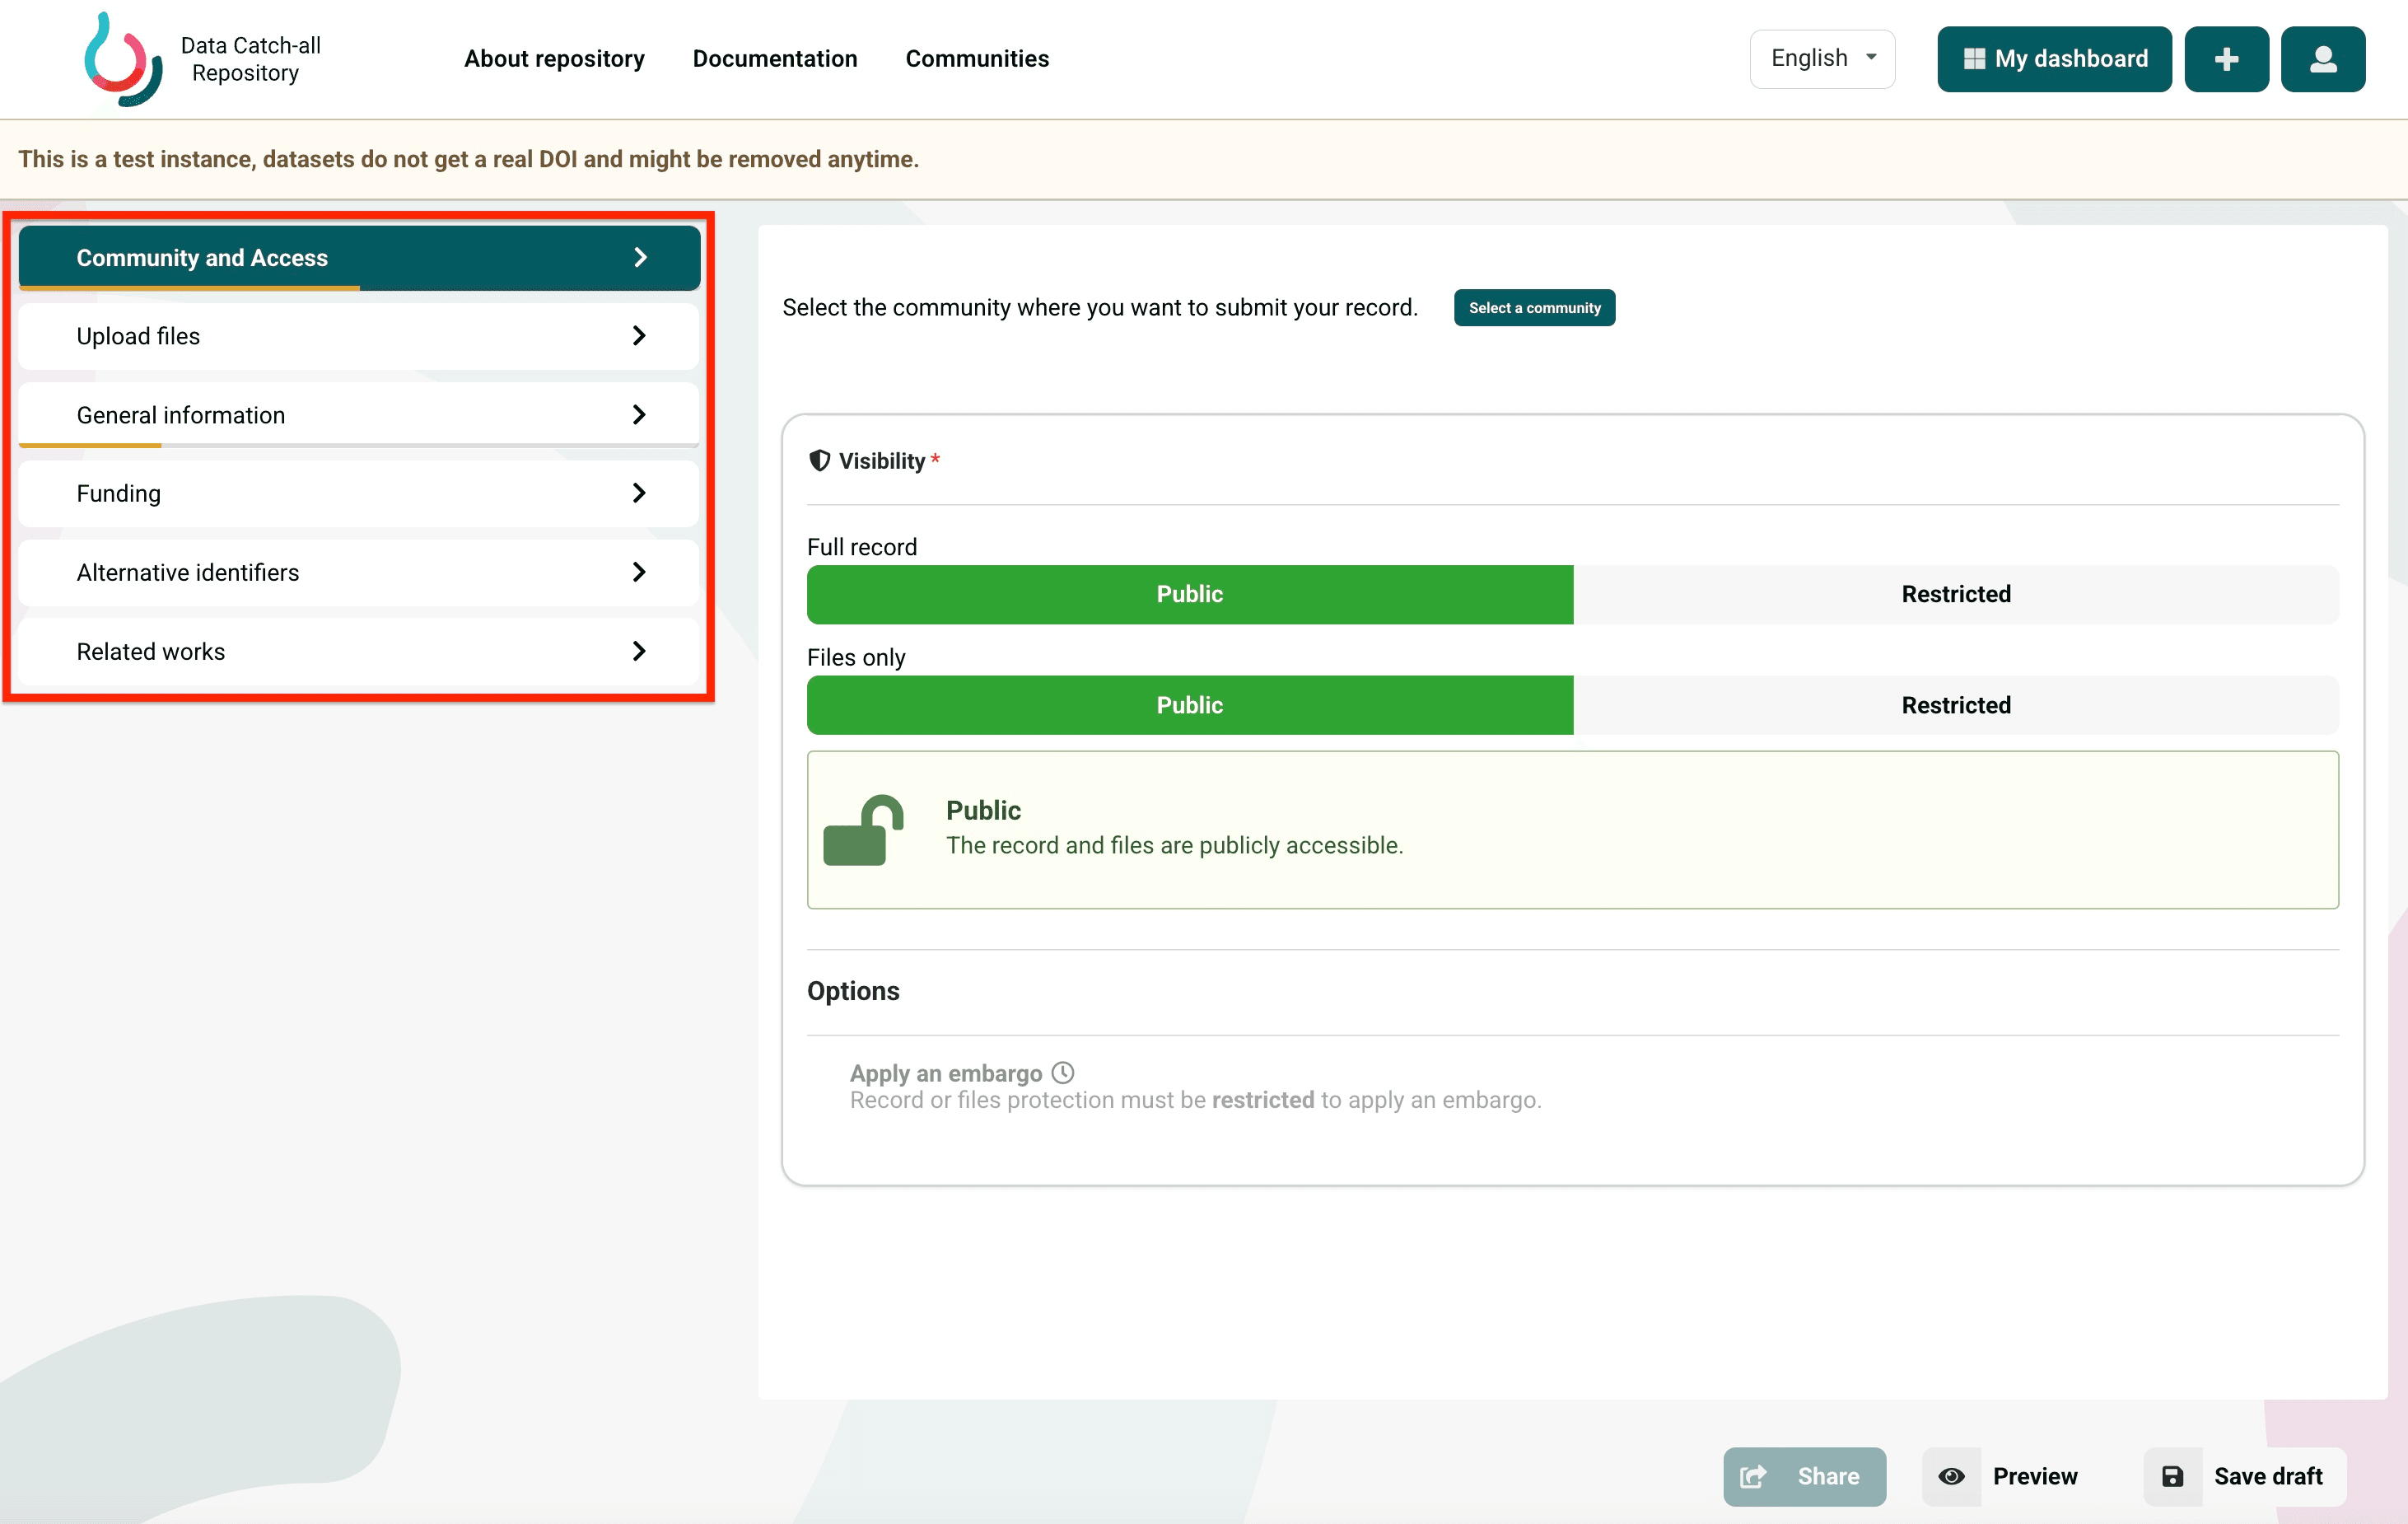
The form is divided into the following sections:
- Community and Access
- Upload files
- General information
- Funding
- Alternative identifiers
- Related works
Fields marked with an asterisk are required.
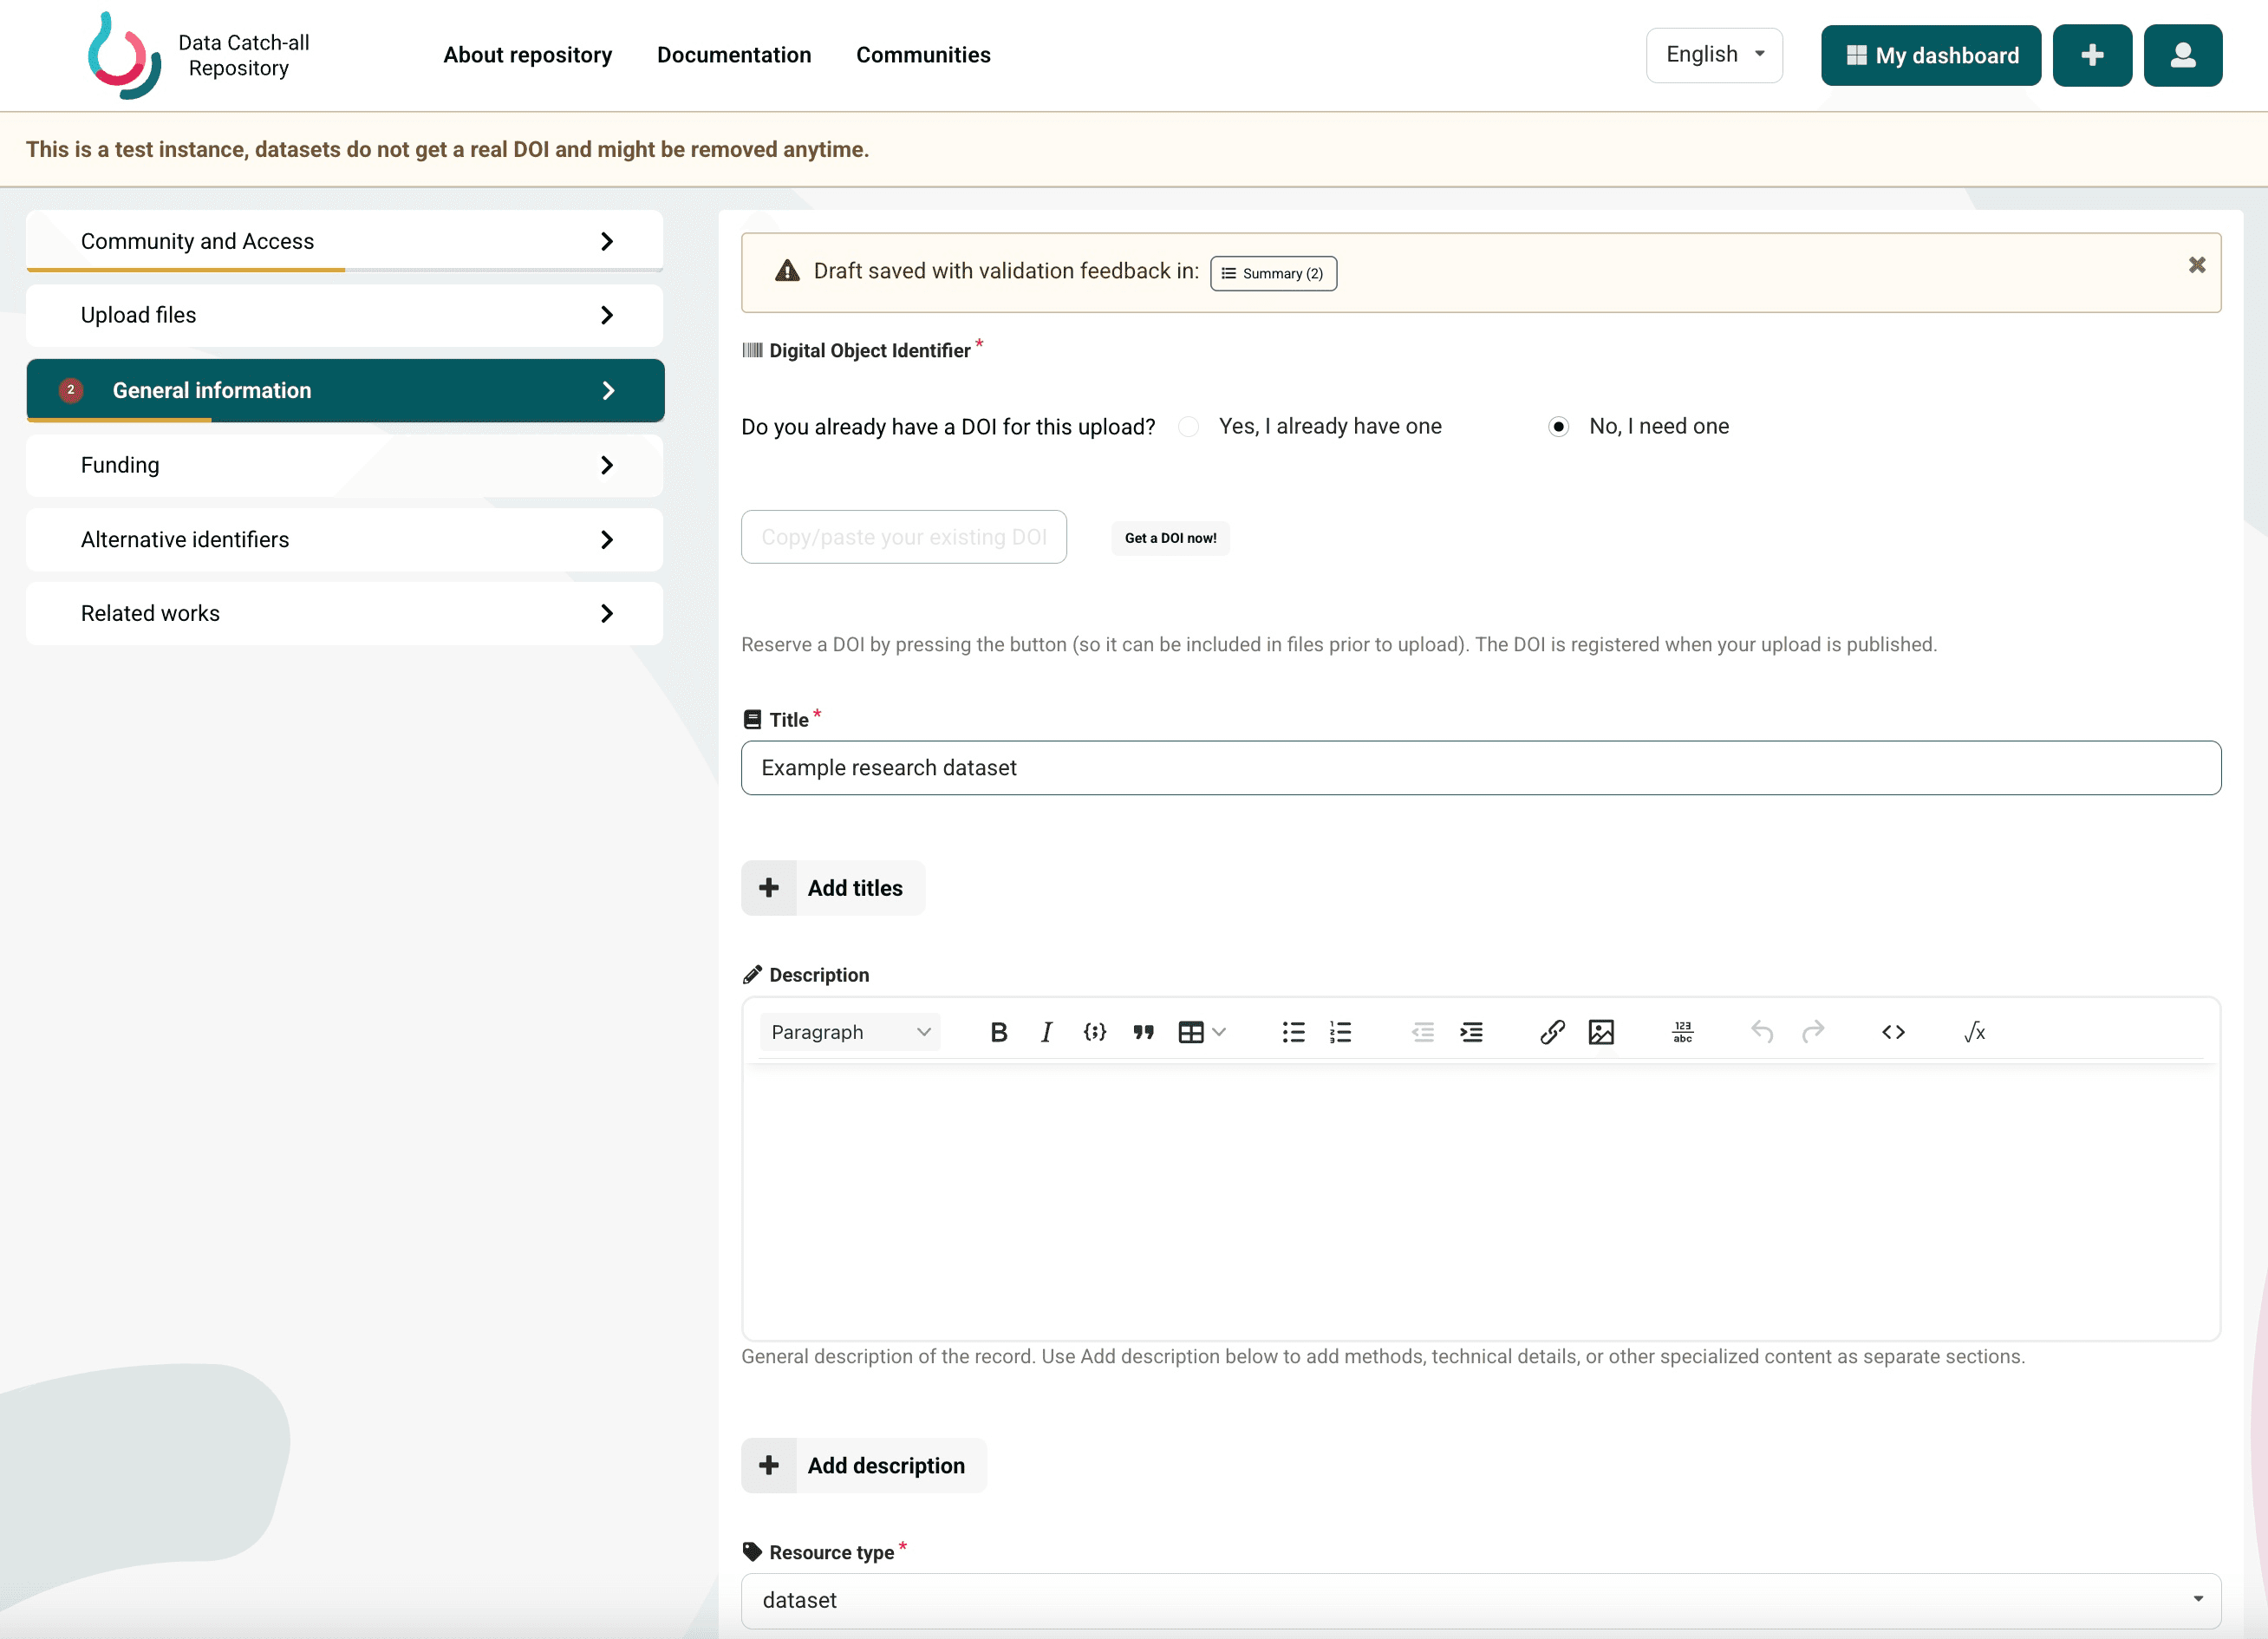
You can save an incomplete record as a draft. Missing or invalid values are highlighted in the form, and the corresponding sections are marked in the left-hand navigation.
Community and Access
Use the Community and Access section to select the community to which you want to submit the record and to configure its visibility.
Select Select a community and choose the appropriate community.
Access can be configured separately for the full record and for its uploaded files.
The following configurations are available:
- Public record and public files — the metadata and uploaded files are publicly accessible.
- Public record and restricted files — the metadata is publicly accessible, but access to the uploaded files is restricted.
- Restricted full record — access to both the metadata and uploaded files is restricted.
Restricted content is not publicly accessible. Access is governed by the permissions configured for the record.
Applying an Embargo
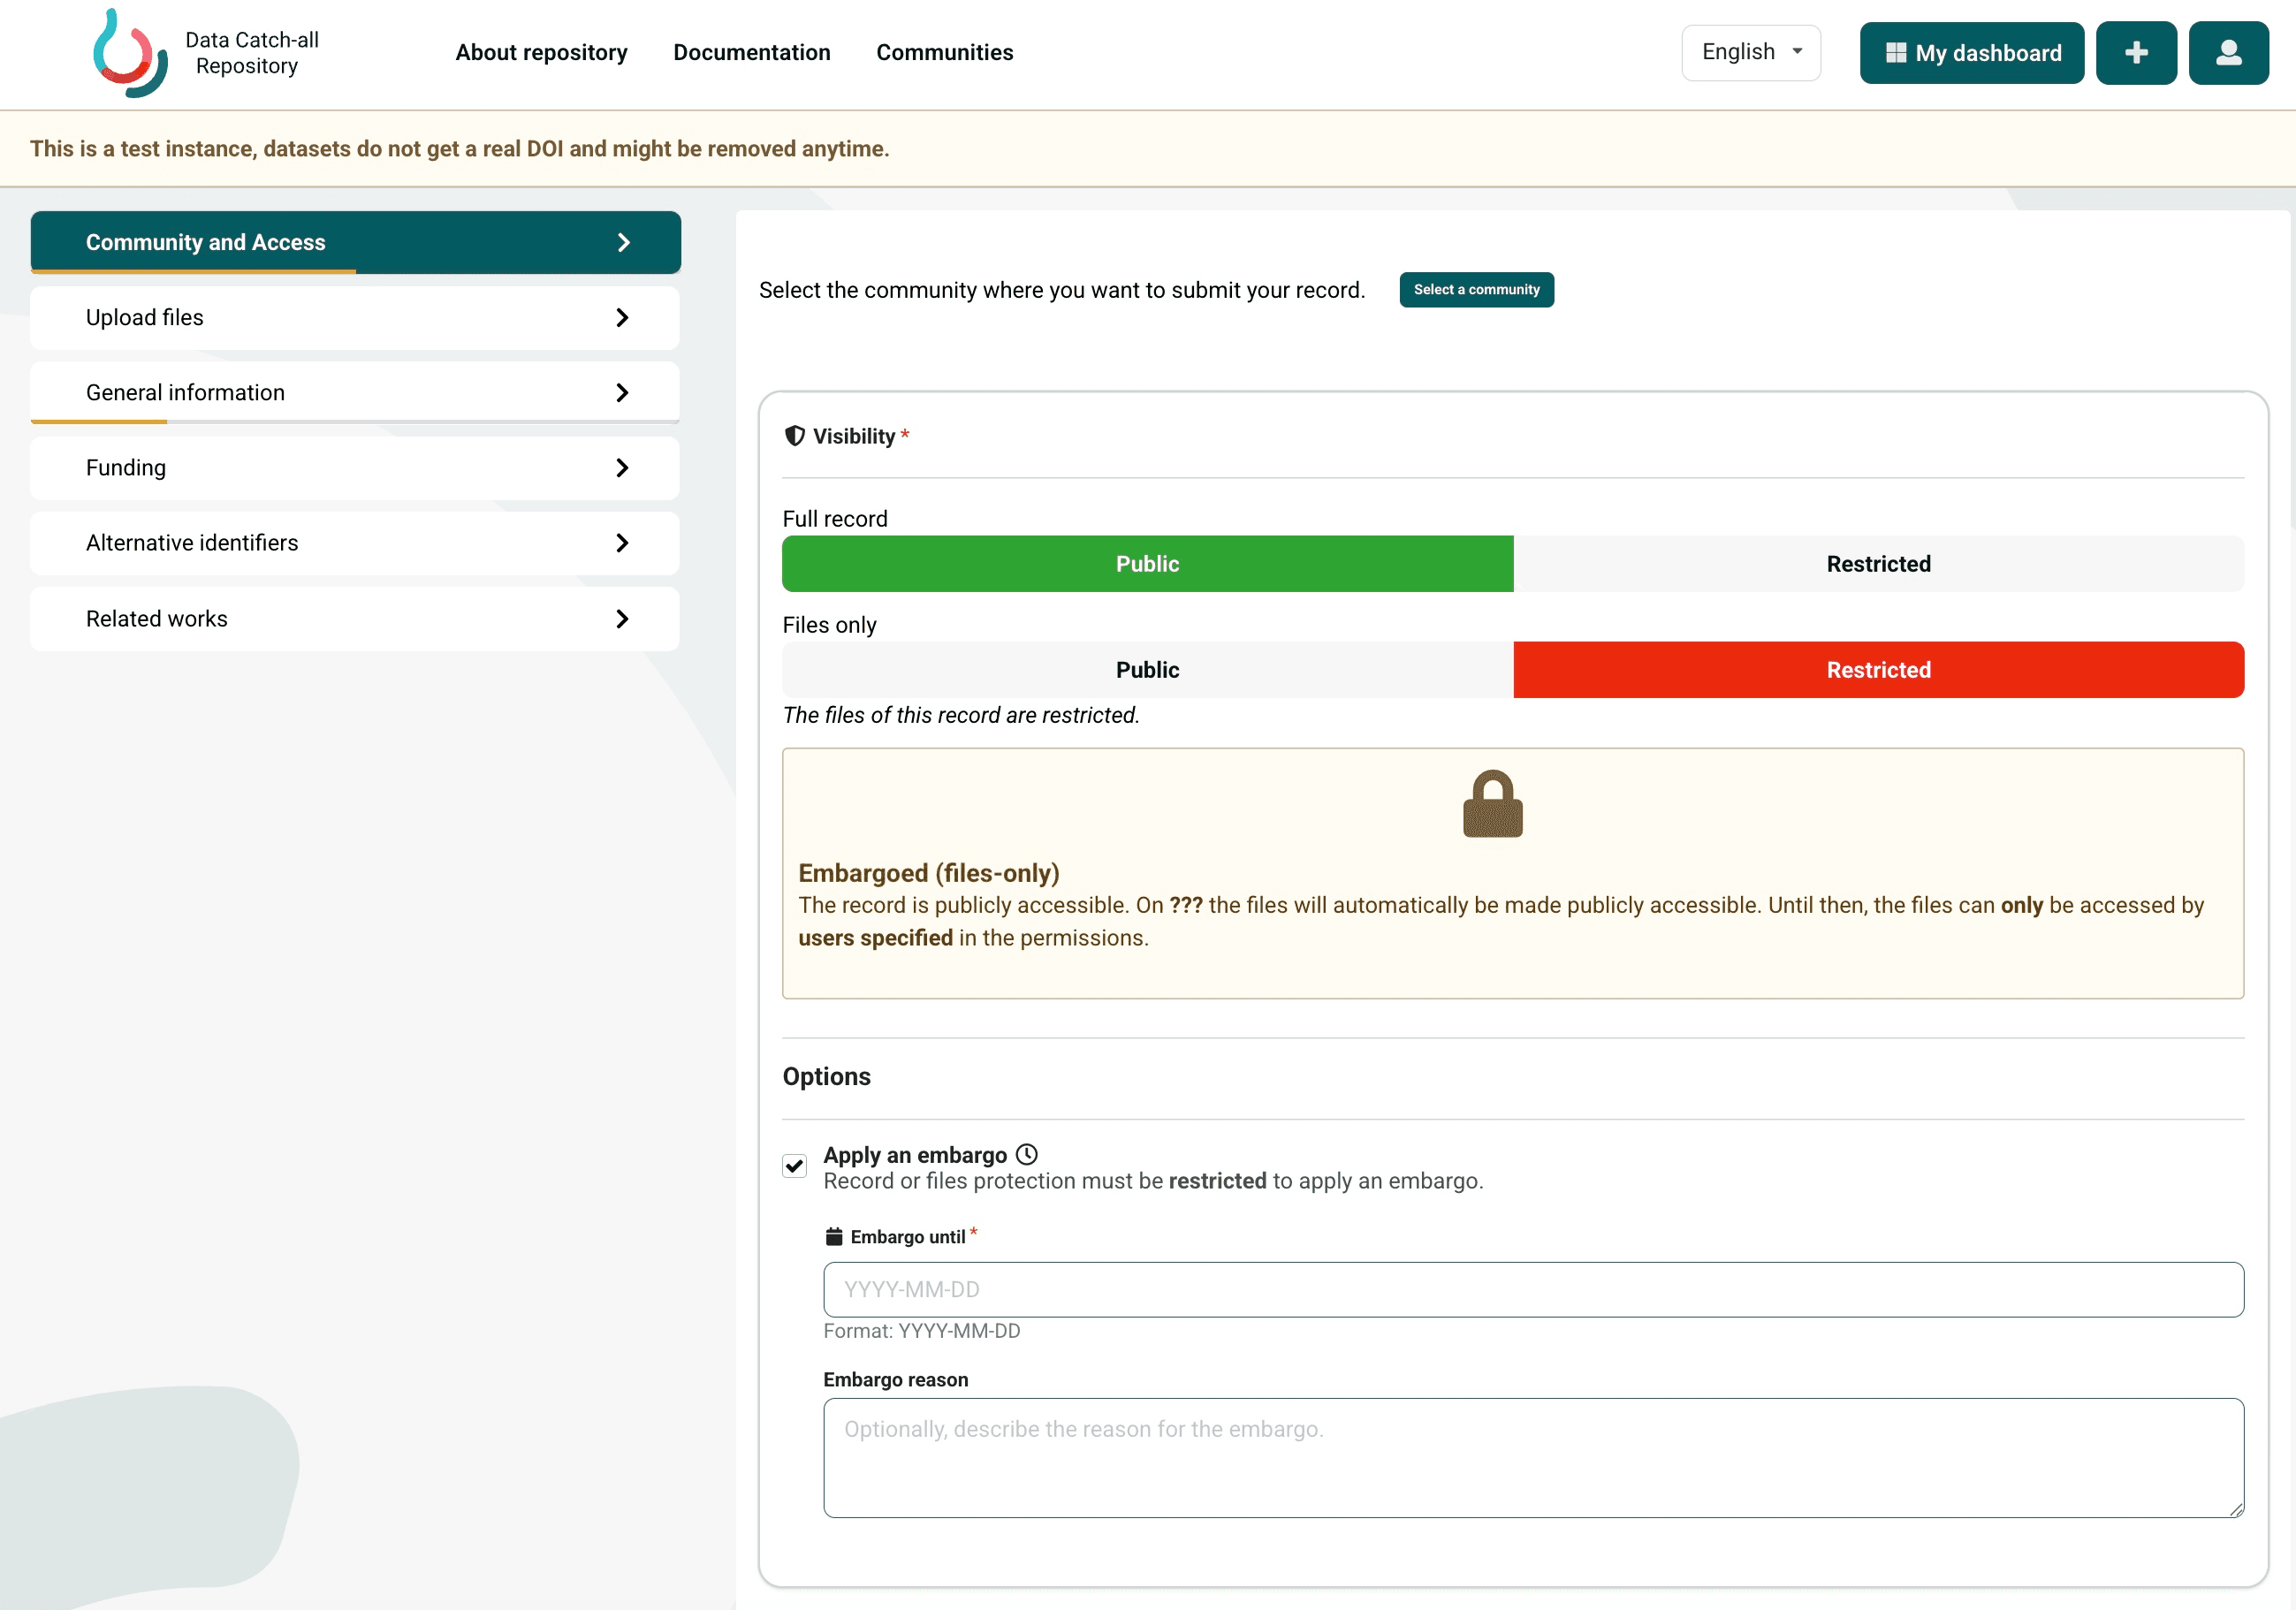
An embargo can only be applied when the full record or its files are set to Restricted.
To apply an embargo:
- Set Full record or Files only to Restricted.
- Select Apply an embargo.
- Enter the embargo end date in the Embargo until field.
- Optionally, describe the reason for the embargo in the Embargo reason field.
The embargo end date is required when an embargo is enabled.
If only the files are embargoed, the record metadata remains publicly accessible. The files automatically become publicly accessible when the embargo expires.
If the full record is embargoed, both the metadata and uploaded files automatically become publicly accessible when the embargo expires.
Upload Files
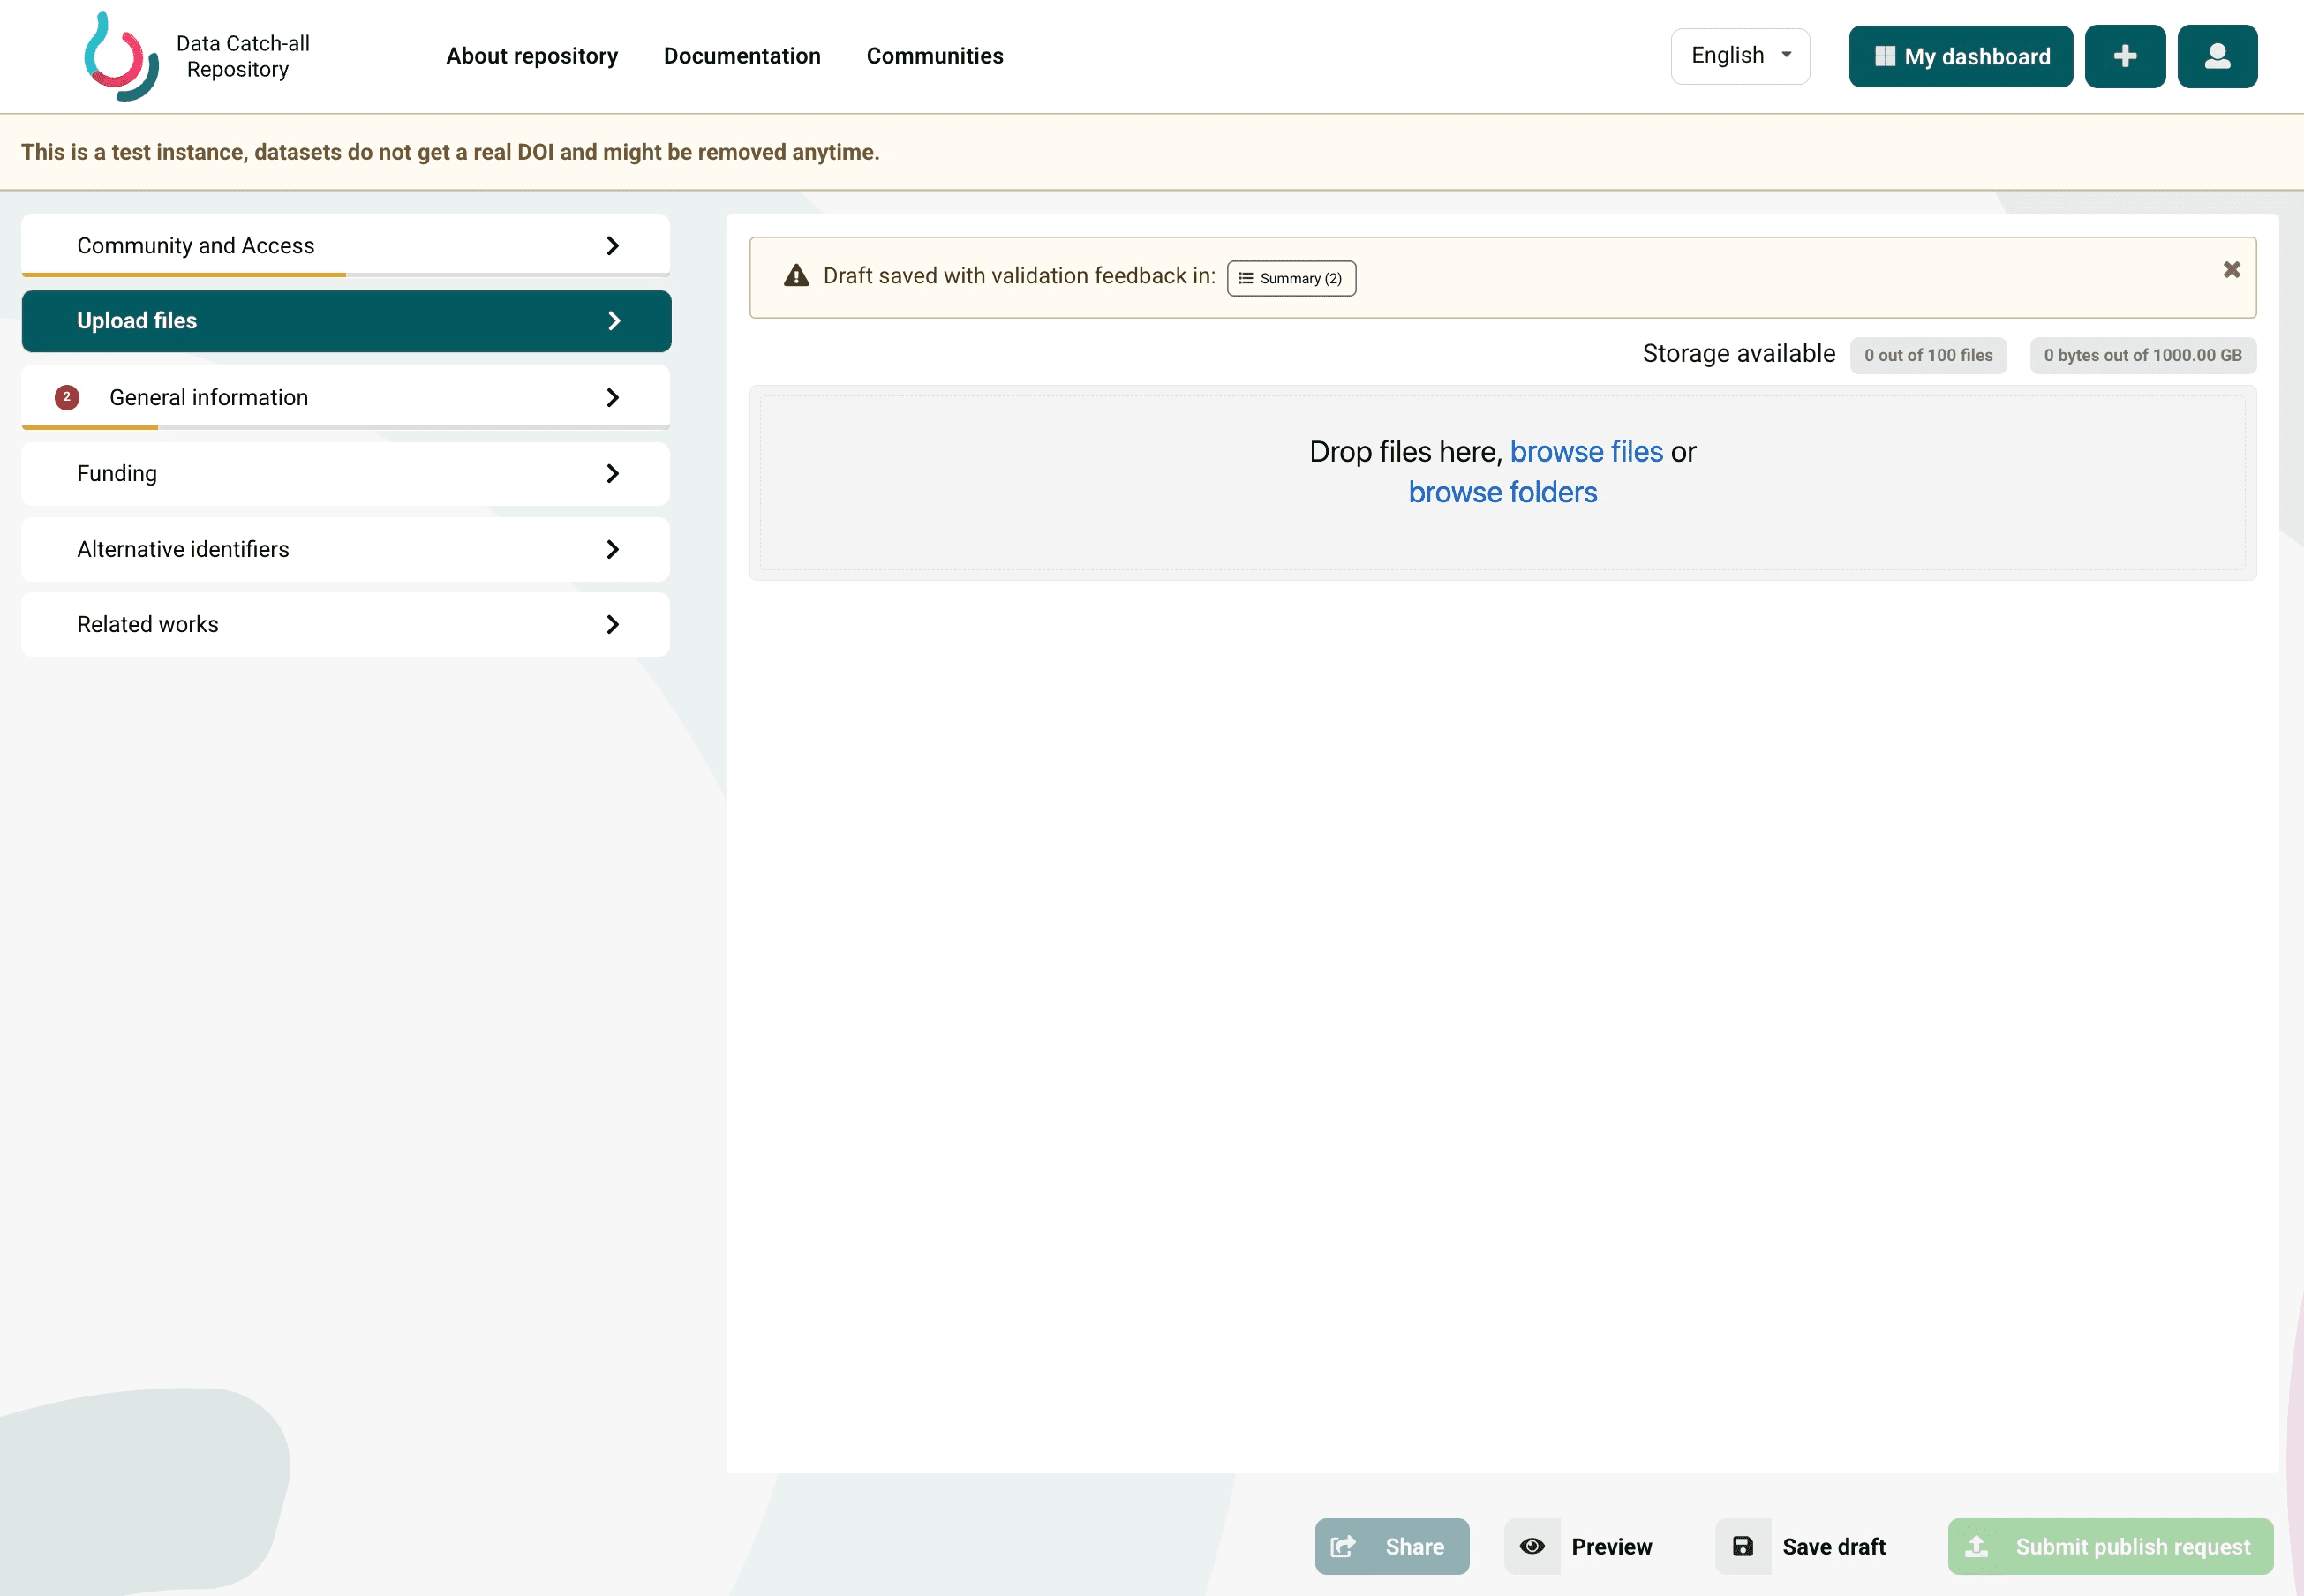
Use the Upload files section to add files associated with the record.
Files can be added by:
- dragging them into the upload area;
- selecting Browse files;
- selecting Browse folders.
Before submitting the record for publication, you must upload at least one file. Metadata-only records are not supported in the Data Catch-all Repository.
The current limits shown in the repository are:
- a maximum of 100 files per record;
- a maximum total size of 1,000 GB per record.
The applicable limits are displayed in the upper-right part of the upload section.
General Information
Use the General information section to provide the main descriptive metadata for the record.
DOI
First, specify whether the record already has a DOI:
- select Yes, I already have one and enter the existing DOI; or
- select No, I need one if you need a new DOI.
Select Get a DOI now! to reserve a DOI before publication. The reserved DOI can then be included in the uploaded files. The DOI is registered when the record is published.
Required Metadata
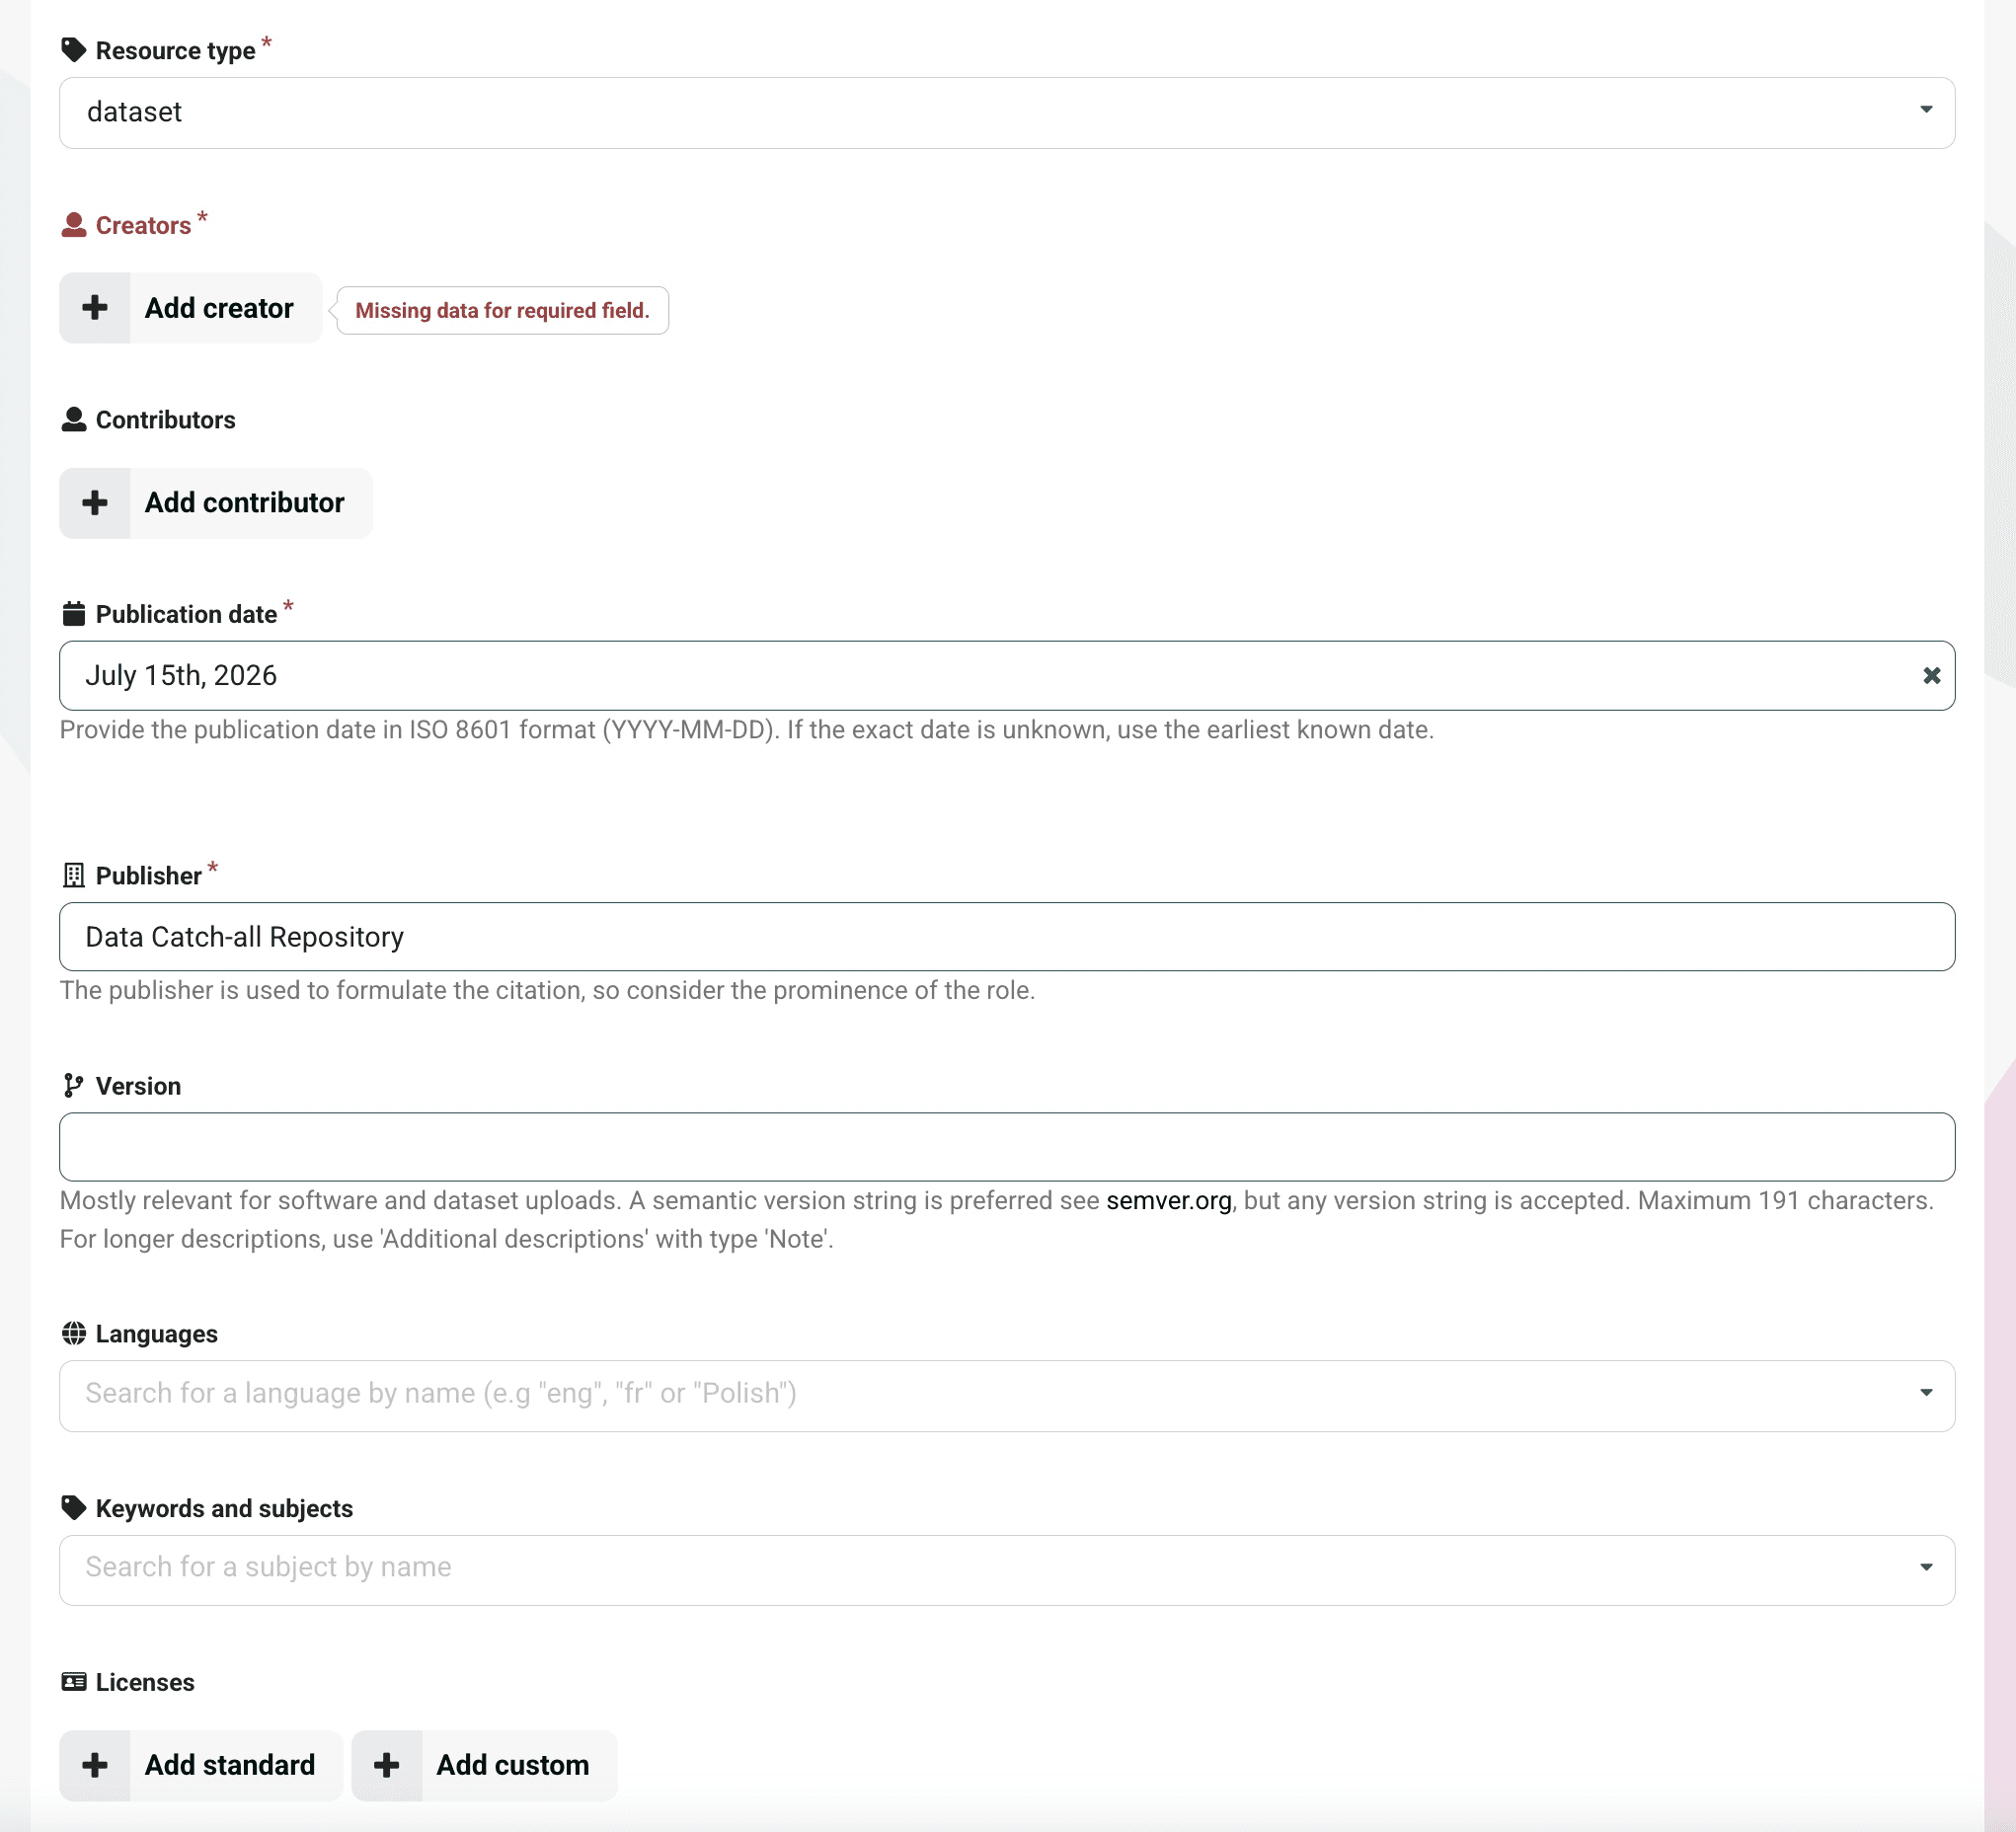
The required metadata includes:
- Title
- Resource type
- at least one Creator
- Publication date
- Publisher
Depending on the record, you can also provide:
- alternative titles;
- a description and additional descriptions;
- contributors;
- version information;
- languages;
- keywords and subjects;
- licences;
- relevant dates.
Some fields use controlled vocabularies. Select one of the available values from the corresponding list.
Funding
Use the Funding section to add grants or other funding associated with the record.
Select:
- Add to search for and select an existing funding reference;
- Add custom to enter funding information manually.
Alternative Identifiers
Use the Alternative identifiers section to add identifiers other than the record’s primary DOI.
For each alternative identifier:
- Enter the identifier in the Identifier field.
- Select the corresponding identifier scheme in the Scheme field.
- Select Add identifier to add another identifier, if necessary.
Related Works
Use the Related works section to add publications, datasets, software, or other resources related to the record.
A related resource can be added in either of the following ways:
- select Load from DOI to retrieve its metadata using a DOI;
- select Add manually to enter the related resource information yourself.
Saving and Validating a Draft
Select Save draft to save your progress.
A record can be saved even if it is incomplete. If required information is missing or a value is invalid, the repository saves the draft with validation feedback.
The validation feedback is displayed:
- in the summary at the top of the form;
- as numbered indicators next to affected sections;
- directly next to the missing or invalid fields.
Resolve all validation errors before submitting the record for publication.
Previewing the Record
Select Preview to check how the record and its metadata will appear.
The preview does not publish the record and does not prevent you from continuing to edit the draft.
Submitting a Publication Request
Once all required information has been provided and all validation errors have been resolved, select Submit publish request.
The subsequent processing of the record depends on the workflow and permissions of the selected community.
For more information, see Record Life Cycle and Visibility.